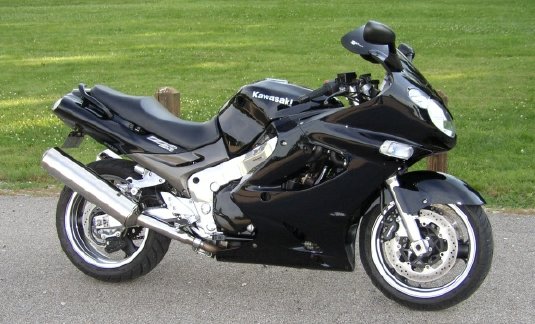
Written By: Todd Keeran (Lyt_Em_Up)
The purpose of this article is to give step by step instruction on polishing the ZZR aluminum
parts including frame and wheels. This is the "at home do-it-yourself" way. I know there are
commercial grade tools and products but I am writing this for anyone to be able to do this at
home with readily available supplies.
What you will need to have before you get started:
- Aircraft or Auto grade paint remover (I used "Formula A" by "Klean-Strip" gel type)
- #3 coarse steel wool
- Sandpaper (I used 3M imperial wet-or-dry) in grits, 36, 80, 100, 180, 240, 320, 600, 1000,
1500, 2000.
- A roll of paper towels for cleanup and Old rags for polishing
- Gloves and 1" paintbrush for applying stripper
- Variable speed electric drill for buffing
- 4"x 1/2" and 6"x 1/2" flannel buffing wheels for the drill
- Electric palm sander
- 3M pro formula mag & aluminum polish paste, #39529
- Duct tape
- Dust mask and eye protection (of course)
You can get most of this stuff at your local auto parts store. If not, then try a paint supply
store or a body shop)
Forks
Start by removing the front fender, reflectors, speedo cable, and brake calipers. You can remove
the front wheel if you want to polish the inside of the forks. I left my wheel on and was able to
get all except a small strip on the inside of the forks which is not noticeable. Pop the rock guards
up and tape them up and out of the way. Apply generous coat of paint stripper to the forks and let it
work a while. Use your coarse steel wool to scrub off the old finish and wipe it clean with paper towels.
You may have to do this a few times to get all the finish off. Start dry sanding with 36 or 80 grit
paper on the palm sander until all of the "pits" are out. You will have to hand sand a few spots that
the sander can't get at. Work your way up dry sanding through all the grits of paper making sure all
sanding scratches are out from the previous grit before going on to the next. Take your time - you don't
want to have to go back down a few grits of paper to get scratches you missed. Ok, now you've just
finished up with the 2000 grit and the forks are as smooth as a baby's butt right? Good!! Now's when
the magic happens. Take your drill with a 4" buffing wheel chucked up in it and the aluminum polishing
paste. Apply a small amount of paste to the forks with your finger. Do small areas about 3 or 4 inches
or so at a time. With medium to firm pressure begin buffing at medium speed. Keep doing small areas
until the forks have been done once. Apply paste and go over the forks again using less pressure and
the highest speed in a little bit larger areas. You may have to do this buffing step a few times to get
the perfect mirror finish. That's it, sounds simple, but its actually quite alot of work.
Frame
Start by removing the lower cowling, foot peg plates and pegs, the side covers between the seat and
frame, fuel shutoff knob, sidestand, exhaust cans, round chromed plastic covers, and the Kawasaki ID
tag on the right frame side from the bike. Put duct tape on the fuel tank and engine covers so no stripper
gets on them and they are not scratched if you bump them with the sander or buffer. The lower frame sides
below the weld are the same pot metal as the forks so use the same process on those that you did on the
forks. The upper frame sides however are MUCH MUCH easier. Start with stripper on the frame sides but I
don't suggest going any farther forward than the lug where the cowl bolts to the frame (unless you like
polishing stuff that you can't see or maybe you have a polishing fetish and you can't get enough of it).
On these upper frame halves start out with the 320 paper and work up from there after you strip the paint.
These upper frame halves and the swing arm sand fast and smooth and hold a super shine. Also, avoid sanding
the weld beads unless they are scratched and need it as they polish up great after just stripping the paint.
Buff just like you did the forks with the 4" wheel in the tight spots and the 6" for the large areas. I
believe 1/8" aluminum pop rivets are what I used for putting the Kawasaki tag back on.
Swingarm
Same as the upper frame. Left my wheel on and didn't do the inside of it. Rear tips of the swingarm
are rough cast like the forks and lower frame.
Footpeg plates
Remove the pegs from them. No need to strip the back side of these plates either. Start with 320 on
these as well.
Footpegs
These are small and not very noticeable but they will shine up. Don't waste too much time in them.
Hit 'em with 600 grit, go to 1000 then buff 'em. Re-install them.
Sidestand
Don't do it!! Its steel. I Almost stripped mine then common sense kicked in. I suggest doing the
"magnet" test first on anything else you want to polish up.
Motor Mount Sub Frame
I didn't do mine yet but I bet it would look good through the cowling side holes.
Wheels
Polished wheels are probably the most desired upgrade for the ZZR or any other bike for that matter.
Let me start out by saying "Pain in the A** to do". I did only the lips of mine and did them while they
were mounted on the bike. That powder coat or epoxy coating that's on them is pretty hard to remove. I tried
a few different kinds of stripper and none worked any better than the other. Stripper will soften it but
didn't bubble it up and lift it up as I was hoping so I scrubbed it with 180 grit when it got soft and kept
working my way around till it was good enough.
Rear Wheel
Pick your bike up on the center stand, put the bike in neutral and turn the rim as you go around it. Use
large sanding strokes to keep the aluminum uniform. I started with 180 till the machining grooves were gone
then worked my way up in grit and buffed with 4" just like all the other parts. Actually, I had the bike running
for a short time in 6th gear while holding sandpaper on the rim. That worked very well, but if you decide to
do it this way please BE CAREFUL!! Strap the bike down and block the front wheel. Fingers don't grow back very
fast and if the bike comes off the center stand while its running then you can only imagine what would happen.
Front Wheel
Put the bike on the center stand and put a steel bar through the front axle. Pick up on the bike and put
jackstands or blocks under the bar ends (have someone help you). This will hold the front end up nice and stable.
Work it just like the rear wheel. I used a electric motor with a 4" rubber drum sander drum mounted on it (no
sandpaper, just the rubber drum) and set it up against the front tire to turn it while I worked on it. Spun it
about 15mph or so with that thing, but turning it by hand will work also.
 I hope this How-To article will help you through the polishing process. With a little bit of hard work this
bike can really shine. Take your time and do a good job, be safe, and Good Luck.
I hope this How-To article will help you through the polishing process. With a little bit of hard work this
bike can really shine. Take your time and do a good job, be safe, and Good Luck.